Missing out? Click here to get my new articles delivered to you
 The ten yard ‘heel and sit’ is the third of our Grade One training milestones.
The objective of this training exercise is to establish basic lead manners rather than a formal ‘obedience style’ heel.
You will need to teach the basic sit before you start training for this milestone
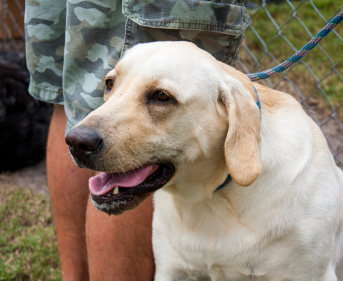
The heel position
You will be teaching the dog to walk on a loose lead in a comfortable position on your left hand side (right hand side if you shoot left-handed).
You want him neither pressing hard against your leg nor wandering too wide.
And not pulling forward, or lagging behind.
There are lots of ways to do this.
Different methods
Tradtionally, gundog trainers established heelwork on the lead with an older, confident puppy at 6-8 months of age.[wp_ad_camp_1]Nowadays, some of us teach an off lead heel first, and you can find a simple method of doing this in this article:
Grade One heelwork is all tested on the lead, so you don’t need to teach off lead heelwork at this point if you don’t want to.
Challenges
Walking to heel is one of the most common problem areas for novice trainers; a lot of people find it very difficult to establish a good heel position with a strong young dog.
This is partly because heelwork requires a lot of practice – every time you see a dog walking nicely to heel, you see someone standing next to him who has put in a lot of time training.
Another reason people often struggle with heelwork is because they try and go too far, too soon.
Heelwork is like any other skill; you need to build up gradually. Just because your dog can walk nicely at heel for five yards, does not mean he is ready to walk at heel for two miles.
Ten yards
The goal for this milestone is just ten yards of loose lead walking. Ten yards is not so far, but it can seem like a very long way to begin with.
Let’s break it down into easy stages
- Simple loose lead walking
- The five yard square
- Two sides in one
- Ten yards heel and sit
You can find simple loose lead walking in the traditional way here: Establishing heelwork. Practice until you can walk three steps with the dog at your side.
Changing direction
Frequent changes of direction are very important in early lead work. They keep the dog focused on the handler, and on the job in hand, and greatly reduce the chance of the dog pulling.
Because it is hard for the young dog to maintain the heel position for very long whilst walking in one direction, using frequent changes of direction we can practice for far longer than we could be simply taking the dog for a walk.
Setting out a square
I suggest you mark the four corners of a square on a suitable piece of ground. I use a yellow ‘cone’ or bucket. You could use a few stones if you prefer.
To begin with, each side of your square need only be three or four yards long. But the object is to work up to five yards in each direction.
Square ‘bashing’
Start in one corner of the square with the dog sitting at your side.
- Say heel and set off towards the second corner.
- If the dog moves ahead, turn around and go back to the corner you started from.
- If he makes it to the corner at heel, reward him.
- Sit the dog and set off for the corner you are facing.
Keep practicing until the dog can heel nicely from one corner to the next. Sitting at each corner in turn.
If the dog is struggling, make the square smaller. When he is competent at four yards, increase the distance between the corners to five yards.
Ring the changes and sometimes do a complete about turn at one corner, marching the dog back to the corner you just came from.
Two sides in one
Now you can occasionally begin to drop the sit at one of your corners. Just turn through ninety degrees and keep walking.
You have just completed a ten yard stretch. It is easier for the dog if you do this with a ‘turn’ in the middle as the turn helps him to keep his focus on you.
Now you want him to learn how to walk ten yards on the straight.
Ten yards straight
Put two markers out six yards apart. Now heel the dog back and forth between them.
Don’t go the whole distance every time, sometimes put a shorter stretch in between. Constantly moving the goalposts ever upwards tends to end in an error, so always slip some easy ones in to keep the dog’s confidence high.
All that remains now is to increase the gap between the markers.
If you have space in your garden you can also practice longer distances simply by making bigger squares.
Stop at each corner for a while, then slip in a two-sided stretch so that the dog is heeling for longer distances interspersed with shorter ones.
Out in the countryside
Your dog needs to be able to walk to heel anywhere, not just where you have been training him.
If you have been training in your garden and you try and do this out in the countryside, you may find it all falls apart. This is because the ground scent is too distracting for the dog and he will keep dropping his head to sniff, or charging forwards with excitement.
So, when you start training in a new location, begin at a much easier level.
Onwards and upwards
Remember, get the first two steps right, and the rest will follow. And remember also, that Grade One training is not ‘proofed’.
Don’t expect that your dog will necessarily be able to complete his ten yard heel and sit in the presence of other dogs or similar strong distractions. We will ‘train’ for these in later exercises.
If you enjoyed this article, you might like my new book: The Happy Puppy Handbook – a definitive guide to early puppy care and training.